Integrate and Use Open API Specifications in Quantum Visualizer
From the 202305 release, Quantum Visualizer has added support to import Open API Specification files through the Data and Services panel. The OpenAPI Specification (formerly Swagger specification) is a framework that is used to define interfaces with which you can design, build, document, and consume REST APIs.
Create an Open API Specification Service
To configure an OpenAPI (Swagger) service in Quantum Visualizer, you need a JSON file that contains specifications for the required APIs. The service retrieves the metadata from the imported JSON file and displays the request and response parameters in the Non-Fabric Services section of the Data & Services panel.
Follow these steps to create an Open API specification service in Quantum Visualizer:
- In Quantum Visualizer, open your project.
- From the Data & Services panel, navigate to the Non-Fabric Services tab.

- Click Configure New.
The Configure Non-Fabric Service dialog box appears.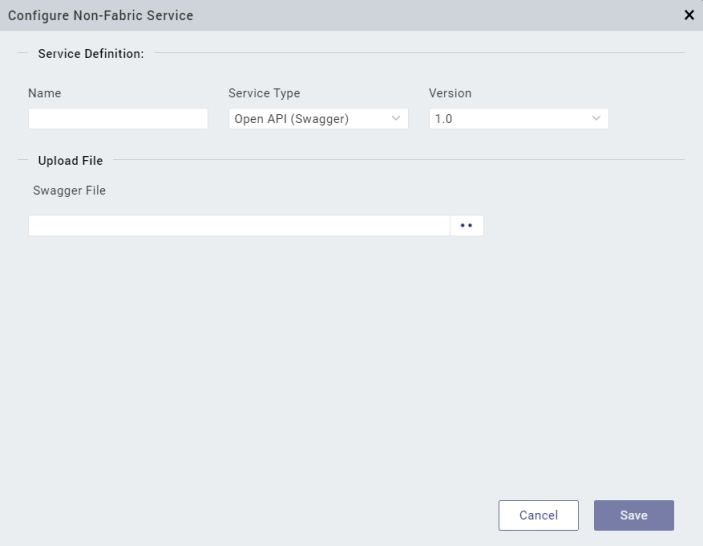
- In the Service Definition section, enter the following details:
- In the Name field, provide a name to identify your Open API Specification Service.
- In the Service Type field, the Open API (Swagger) entry is selected by default.
In the Version field, specify a version number for the service.
NOTE: If you are creating a new service, the version number is 1.0 by default, and it cannot be changed.
- In the Upload File section, enter the following details:
- In the Swagger File field, click the ellipses button (..) to locate and import a JSON file.
The import file dialog box appears. - Locate the file that you want to import, select it, and then click Open.
The file is imported to your current project, and the Server URL and Server Description appear in the Connection Parameters section.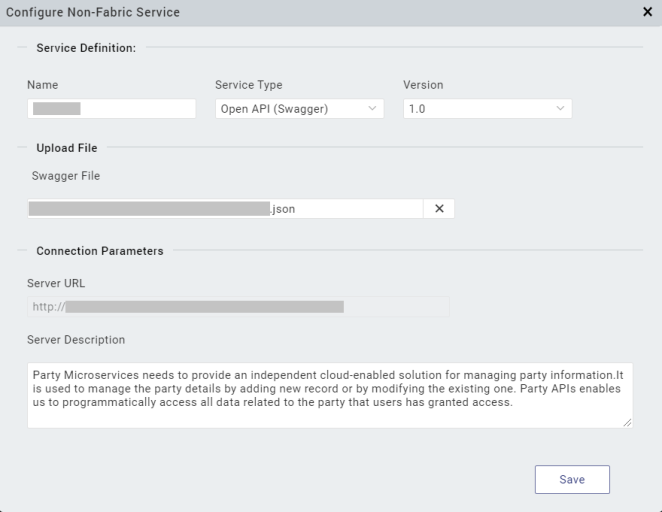
- In the Swagger File field, click the ellipses button (..) to locate and import a JSON file.
- Click Save.
The service appears in the Non-Fabric Services section of the Data & Services panel.
You can expand the service to view its Request or Response parameters.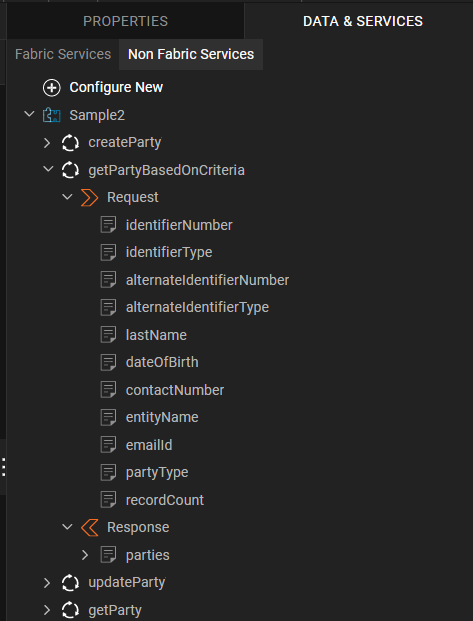
NOTE: From the 202307 release, you can click Cancel or close the Configure Non-Fabric Service dialog box to end the Service Configuration.
Important Considerations and Limitations
- Quantum Visualizer supports the creation of an Open API 3.0 service. However, due to issues with service validation, there may be issues with parsing the Open API service file and listing the services.
- You can create and invoke Open API Specification Services for both the Native and Responsive Web channels.
- In apps that use the Micro App Architecture, you can add the Open API Specification Service only to the Base App.
The Data and Services Panel and the Action Editor of the Composite App only display the Non-Fabric Services associated with the Base App. - You can create multiple Open API Specification Services. However, you cannot edit or delete services after you create them.
NOTE: Support to Edit and Delete a Non-Fabric Service is available from the 202307 release. For more information, refer Edit an Open API Specification Service and Delete an Open API Specification Service.
- When you build a Web app that only uses Non-Fabric Services, the Post Build Action is set as Generate Web App, by default.
- When you build a Web app that uses both Non-Fabric Services and Quantum Fabric Services with the Post Build Action set as Generate Web App, the Include Fabric checkbox appears (if you are logged-in to Quantum Fabric).
Select the checkbox to include both Non-Fabric Services and Quantum Fabric Services in the build process.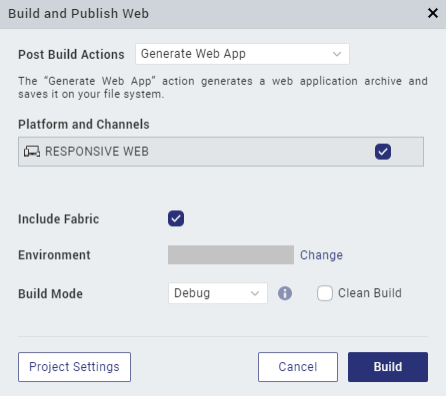
If you are not logged-in to Quantum Fabric, or there is no linked Fabric App, the Include Fabric checkbox does not appear.
Invoke an Open API Specification Service
After you create an Open API Specification Service, you can add the service to the action sequence of a widget. Quantum Visualizer invokes the linked service when the specified action sequence is invoked on the widget.
Follow these steps to define an action sequence for invoking an Open API Specification Service:
- From the Project tab of the Project Explorer, select the form and widget for which you want to invoke the Open API Specification service action.
- In the Properties panel, navigate to the Action tab. For the required action (such as onClick), click Edit.
The Action Editor window opens, and an action sequence is created in Diagram View, by default. - From the left pane of the Action Editor (in either the Diagram View or the Design View), under the Network category, locate the Invoke Service action.
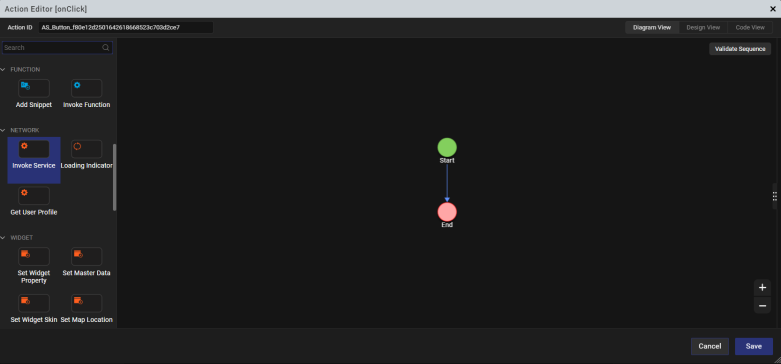
- You can either drag and drop the Invoke Service action onto the action sequence, or simply click the Invoke Service action.
The Invoke Service action is added to the action sequence. - From the right pane of the Action Editor, in the Select Service field, select an Open API Specification service from the drop-down list.
The Open Mapping Editor button and the Custom HTTP Headers and HTTP Config Parameters sections appear.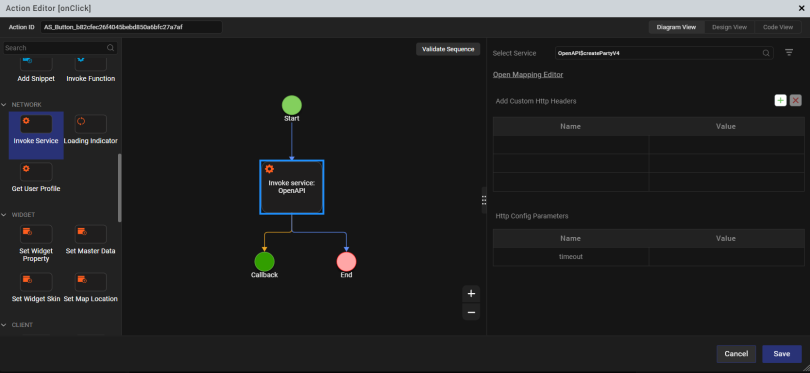
- You can perform any of the following actions:
- Click Open Mapping Editor. The Mapping Editor opens.
Map the service parameters to the required form, variable, or widget on the form from which the service must be invoked. - In the Add Custom HTTP Headers field, define any information that you want to pass in the header of the service call, apart from the default header parameters.
Each row allows you to add a custom header parameter along with its value. Click the + icon to add more rows and the X icon to delete existing rows.NOTE:- The header name must be unique for every custom header. You can give any name to the custom headers you define except for the reserved header names. However, it is recommended to use user-friendly names for the headers.
- Ensure that you add an authorization header with a valid token so that the server can identify the request for the Open API Specification service invoked.
- In the HTTP Config Parameters section, for timeout, enter a value for the time in milliseconds (ms), after which the timeout of the action sequence must occur.
- Click Open Mapping Editor. The Mapping Editor opens.
- Click Save.
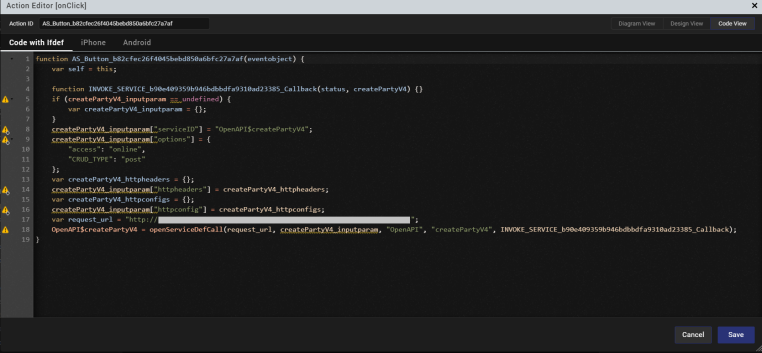
An action sequence that invokes an Open API Specification service is defined for the selected widget.
Edit an Open API Specification Service
From the 202307 release, you can edit a service that is added to your project by right-clicking the service and selecting Edit.
To edit a service, do the following:
- In Quantum Visualizer, open your project.
- From the Data & Services panel, navigate to the Non-Fabric Services tab.
- From the list of available services, right-click the service that you want to edit.
A list of options appears. - Select Edit.
The Edit Non-Fabric Service window appears.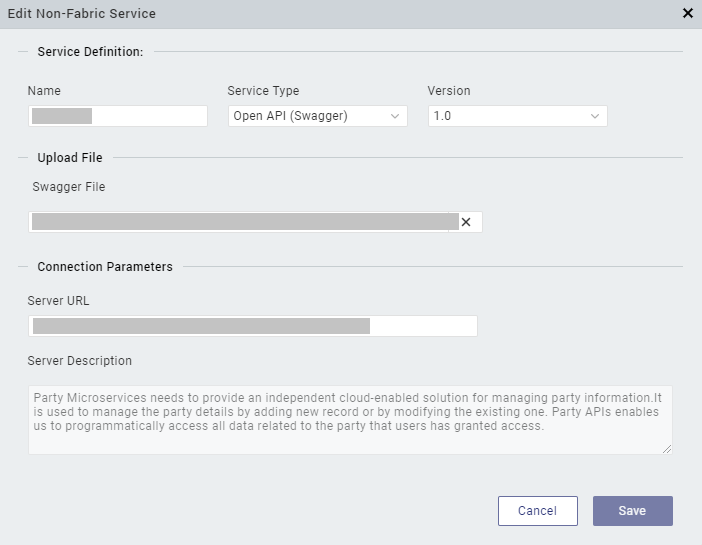
- Make the required changes, and then click Save.
The selected service is updated with your changes.
- When you update the Service Name, ensure that you redo the connections that were made with the previous version of the service.
- When you update the Swagger file, ensure that you redo the connections that were made with the previous version of the service.
- Ensure that you provide a valid Server URL as Quantum Visualizer does not validate the Server URL when you update it.
- You can click Cancel or close the Configure Non-Fabric Service dialog box to end the Service Configuration.
Delete an Open API Specification Service
From the 202307 release, you can delete a service from your project by right-clicking the service and selecting Delete.
To delete an Open API Specification service, follow these steps:
- In Quantum Visualizer, open your project.
- From the Data & Services panel, navigate to the Non-Fabric Services tab.
- From the list of available services, right-click the service that you want to delete.
A list of options appears. - Select Delete.
If there are no actions that use the service, Quantum Visualizer displays a confirmation prompt for the delete operation.
Click Yes to delete the service.If the service is associated with actions in the app, the Confirm Service Deletion dialog box appears.
This dialog box provides details on the operations and their respective action sequences that will be unlinked for that service, and asks for your confirmation whether you want to delete the service.
Click Ok.NOTE: Ensure that you redo the required connections in the Action sequences mentioned in the dialog box.
The service is removed from the Non-Fabric Services list.
