
Live Preview
Overview
Live Preview, a feature introduced in Quantum Visualizer V8 SP4, provides a seamless in-app preview experience within Quantum Visualizer. Live Preview reduces the build and preview time of a Responsive web app. It enables you to view your app as it appears on various devices without having to view the app on those devices.
Faster Previews:
Before V8 SP4, if one had to view a web app, they had to build the app, publish the app, get the URL, and open the URL in a web browser to test it.
From V8 SP4, this multistep process has been simplified. Now, when a developer selects the Live Preview option, Visualizer builds the app. Once the build is complete, a Visualizer Preview window appears which displays the web app.
Preview a Web app on Different Devices on a Single window:
Using Live Preview, you can switch between various Devices to experience their different form factors. From the Visualizer Preview window, you can select the device from a drop-down list.
When you select a specific device, the previewer instantly displays the web app mimicking the view on the device.
In-app Debugging:
Provides you with a debugger to detect and diagnose errors in your applications. You can set breakpoints and step through the application’s code using the in-app debugger.
Preview your Web App with Visualizer
IMPORTANT: Before you run a Live Preview, ensure that you have a project in which you have a Web app designed.
To preview an Responsive Web App, do the following:
- Open the Quantum Visualizer project in which you have your web app designed.
- From the main menu, go to Build > Live Preview Settings.
The Live Preview Settings window appears.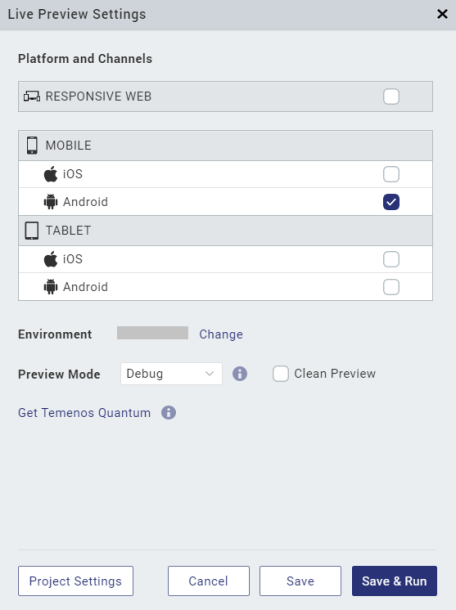
- Select the Responsive Web channel.
- Click Save & Run or click Save and press Ctrl+R (CMD+R on Mac) on your keyboard to launch the Live Preview.
The build process begins in the Visualizer Build tab.
Once the build for the selected platforms is completed, a new Visualizer Preview window appears. - From the Visualizer Preview window, you can select specific platform models from the drop-down menu and adjust their dimensions as required.
In Visualizer, you can see a Live Preview is ready window. The window contains App Details and QR code for the web app. Using the details, you can preview the web app on your device. For more details on how to view the app on your device, go to Preview an App on a Device.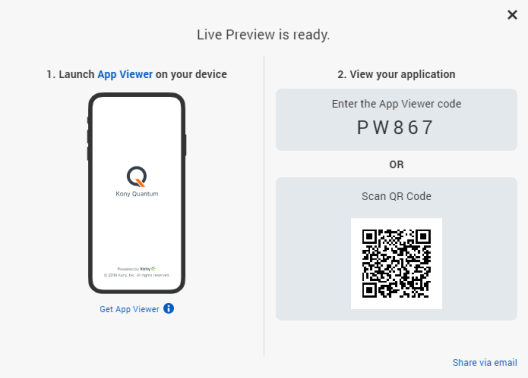
Improve the Load Time for Micro App-based Web Apps
Prior to the V9 Service Pack 7 release, the assets (both static and dynamic) associated with web-based Micro Apps were packaged into a single file and pre-loaded when the app was launched. The process of pre-loading the assets increases the load time of the app.
From the V9 Service Pack 7 release, when you build a Responsive Web App that uses the Micro App architecture, Quantum Visualizer internally categorizes the assets, merges them, and loads them on an on-demand basis.
The assets associated with the app are categorized into the following two types:
- Static Assets: Components, Templates, Form Controllers, and other modules (including nested components and breakpoint data) that you can drag-and-drop onto a Form on the Visualizer Canvas are static assets. Static assets are available at design time.
- Dynamic Assets: Components, Templates, Form Controllers, and other modules that are created dynamically or changed at the data level constitute the dynamic assets. Dynamic assets are created or updated at runtime.
The Responsive Web Framework identifies the dependencies for each Form, and performs static analysis of the assets. The dependent static assets of each Form are then packaged into a file (moduleDependencies.json), which is invoked asynchronously when the app navigates to the Form.
If the project contains dynamic assets, developers must define them for each micro app in the dynamicRequireAssets.json file.
During the build process, Quantum Visualizer merges all the dynamic assets of the linked Micro Apps with the static assets, and loads them when the app navigates to the Form.
To enable the faster load process for Micro Apps on the Responsive Web Framework, follow these steps:
- Navigate to the location of your project. For example,
<your workspace folder>/<appid>/. - Open the projectproperties.json file, and add the following code snippet in the file:
"optimizeAssetLoading: true"
NOTE: The form-based loading of assets is only enabled when you specify the optimizeAssetLoading flag with the value as true.
If you do not specify the optimizeAssetLoading flag, or if you set the value of the flag as false, the assets are pre-loaded when the app is launched. - Save and close the file.
- In the project's root folder, create a new file, dynamicRequireAssets.json.
- In the dynamicRequireAssets.json file, define a list of the dynamic assets in the project.
NOTE: If the project does not contain dynamic assets, you do not need to create the dynamicRequireAssets.json file.
- Save and close the file.
-
Build and Publish the project as usual.
Observe that the time taken to load the assets is significantly less than before.
Here is a sample dynamicRequireAssets.json file for reference:
{
"forms": {
			"form1": [
				{
					"type": "cwc",	//component with contract
					"path" : "com.app1.wid1"
				},
				{
					"type" : "t", //template
					"path": "mainapp1.flxSampleRowTemplate" //id of the template
				},
				{
					"type" : "t", //template
					"path": "microapp1.flxSampleRowTemplate" //id of the template that resides in the child micro app
				},
				{
					"type": "cwoc",	//component with out contract
					"path" : "com.app1.wid2"
				},
				//Break point static data of the corresponding form
				{
					"type": "cwoc",	//component with out contract
					"path" : "com.app1.wid2"
				}
			],
			"appGrpup1" : {
				"appGropu2": {
					"form3": [], // form3 does not have any static templates or components
					"form4": [{
						"type": "cwoc",	//component with out contract
						"path" : "com.app1.wid2"
					}]
				},
				"form2": []
			}
		},
		"templates" :{
			// If any template has nested components, add only those entries
			"flx1" : [
				{
					"type": "cwoc",	//component with out contract
					"path" : "com.app1.wid2"
				},
				{
					"type": "cwoc",	//component with out contract
					"path" : "com.app1.wid3"
				},
			]
		}
	},}
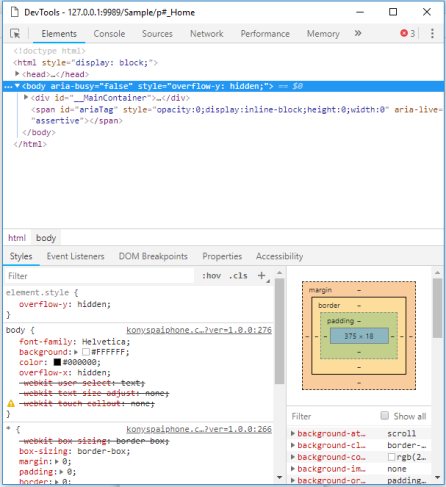
Debugging in Visualizer Live Preview
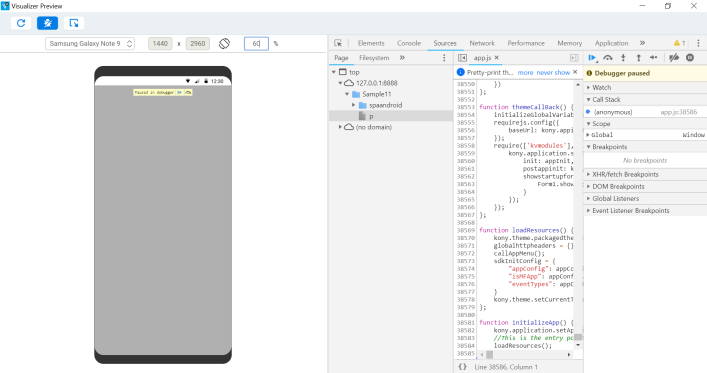
Quantum Visualizer V8 SP4 comes with an in-app debugger that can detect and diagnose errors in applications. Responsive Web apps can be debugged within the Visualizer Preview window using the latest Visualizer debugger.
After launching the Live Preview, a debugger window automatically appears within the Visualizer Preview window.
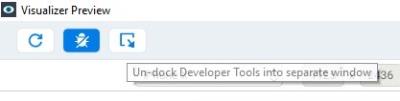
You can also open the debugger in a separate window by clicking on the Un-dock Developer Tools into separate window button on the upper-right corner of the Visualizer Preview window.
The debugger allows you to control the execution of your application by:
- Setting breakpoints.
- Suspending launched applications.
- Stepping through your code.
- Examining the contents of the variables.
Debugging an application involves launching the application in the Live Preview mode on your desktop.
You can then use the in-app Google Chrome debugger to debug the application. For information on using the Chrome debugger, see Get Started with Debugging JavaScript in Chrome DevTools on the Google Chrome website.
To understand how to Debug an application for iOS and Android platforms you can refer to:
Limitations
The Live Preview feature has the following limitations:
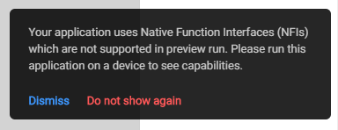
- It does not support viewing the functionality of the NFIs/FFIs in your app. If your app contains an NFI or a FFI or any third-party library dependency an error message is displayed.
- It does not support the execution of APIs that require a handheld device, for example: Vibration API.
- You must still view your Native applications on a handheld device.